
Walk into a high-end furniture store, and you will likely spot a table with a surface so glossy it looks like liquid glass. That stunning, deep shine isn’t just for factory-made pieces. With the right technique, you can achieve that same professional look right in your garage or workshop. Learning how to epoxy a table top transforms old, tired furniture into a modern centerpiece and protects wood surfaces for years to come.
This guide is designed to take the mystery out of working with resin. Whether you are a seasoned DIY enthusiast or a complete beginner, we will walk you through the entire process. By the end of this article, you will understand the critical preparation steps, the exact mixing techniques needed for a crystal-clear cure, and the finishing touches that separate a good job from a great one. Let’s turn that plain surface into a work of art.
Why Choose an Epoxy Finish?
Before we dive into the messy part, it helps to understand why epoxy resin application is such a popular choice for table tops. Unlike traditional polyurethane or varnish, epoxy creates a thick, durable coating in a single pour. This “flood coat” is self-leveling, meaning it naturally spreads out to create a perfectly flat surface.
Beyond aesthetics, an epoxy finish is incredibly tough. It resists scratches, water damage, and heat better than most standard wood finishes. It also highlights the natural grain of the wood, making the colors pop and adding a depth that other sealants can’t match.
Essential Materials for Your DIY Epoxy Table
Gathering the right tools beforehand is crucial. Once the epoxy starts curing, you won’t have time to run to the store. Here is your shopping list for a successful pour.
The Basics
- Table Top Epoxy Resin: Ensure you buy “table top” or “coating” resin, not “deep pour” resin, which is meant for river tables.
- Mixing Containers: You need several clean, graduated buckets.
- Stir Sticks: Flat-bottomed wooden or plastic sticks work best.
- Spreader: A plastic notch trowel or a simple squeegee.
- Heat Gun or Propane Torch: Essential for popping bubbles.
Prep and Safety Gear
- Sandpaper: Various grits from 80 to 220.
- Masking Tape or Painter’s Tape: To seal edges if necessary.
- Plastic Drop Cloths: Epoxy ruins floors, so cover everything.
- Nitrile Gloves: Latex can sometimes react with resin; nitrile is safer.
- Respirator: Use one rated for organic vapors if working in a poorly ventilated area.
- Level: A table that isn’t level results in a lopsided finish.
Step 1: Preparing Your Workspace and Surface
Preparation is 80% of the work when you learn how to epoxy a table top. If you rush this stage, you will likely end up with dust particles, uneven spots, or a messy floor.
Create a Dust-Free Zone
Dust is the enemy of a stunning epoxy finish. Choose a workspace that is clean, dry, and temperature-controlled (ideally between 70°F and 75°F). Lay down your plastic drop cloths generously. Raise your table top on blocks or pedestals so the excess resin can drip off the edges freely without gluing the table to the floor.
Sanding and Cleaning
Sand your wooden surface thoroughly. Start with 80-grit to remove old finishes and work your way up to 220-grit for a smooth feel. Once sanded, remove every speck of dust. Use a vacuum followed by a tack cloth or a rag dampened with isopropyl alcohol.
Seal the Wood
This is a step many beginners skip. Wood is porous and contains air. If you pour a thick layer of epoxy directly onto bare wood, air bubbles will release from the wood grain and get trapped in the resin as it cures. To prevent this, apply a thin “seal coat” of epoxy. Paint it on with a brush and let it cure for 4-6 hours. This locks the air inside the wood.
Step 2: Mixing the Epoxy Resin
Proper mixing is the difference between a hard, glassy surface and a sticky, gummy mess that never cures.
Measure Precisely
Most table top epoxies come in a 1:1 ratio by volume. Do not eyeball this. Use graduated mixing cups to measure equal parts of resin (Part A) and hardener (Part B).
The Two-Container Method
Pour the two parts into a clean bucket. Mix slowly and thoroughly for at least 3-5 minutes. Scrape the sides and bottom of the bucket constantly. Unmixed resin sticking to the sides will cause soft spots on your table.
For the best results, pour your mixed resin into a second clean bucket and mix for another minute. This ensures absolutely no unmixed material remains.
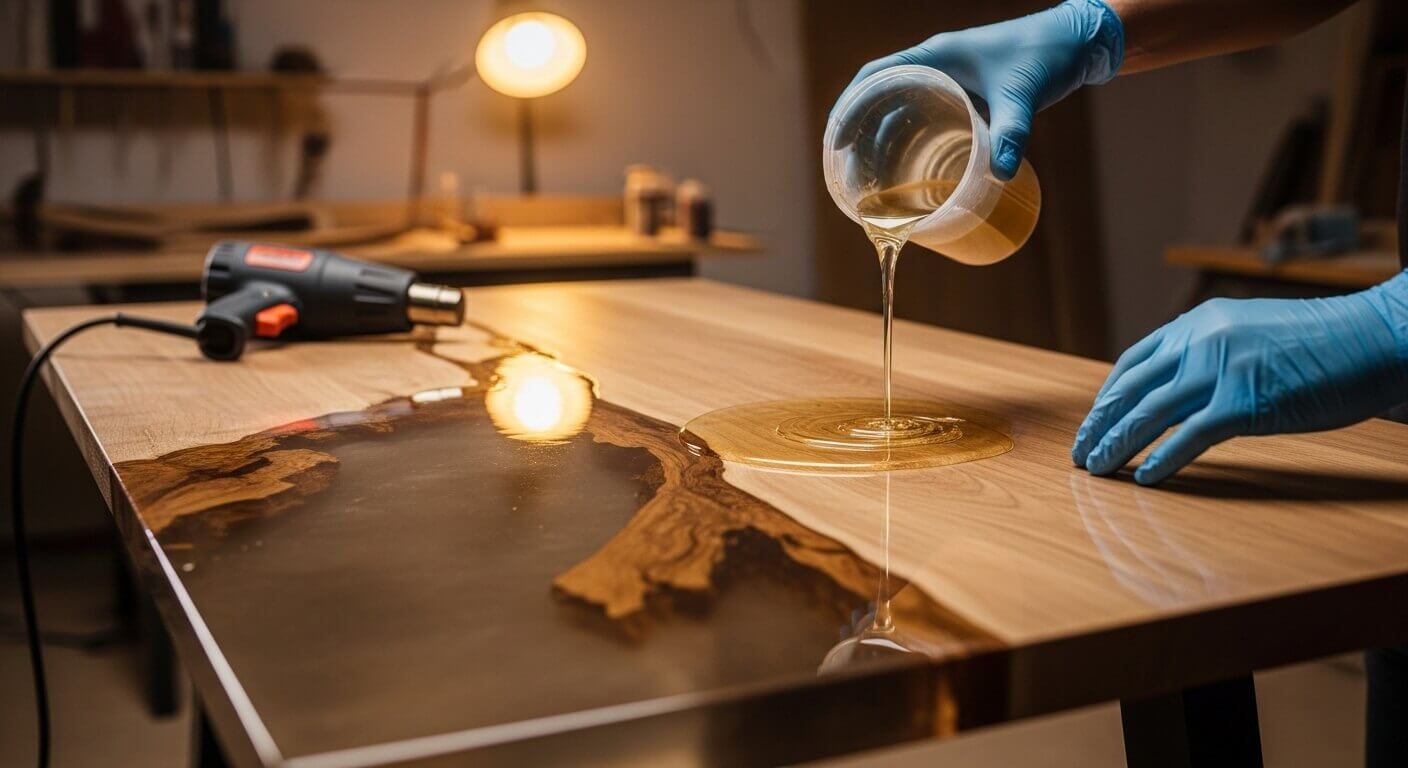
Step 3: Pouring and Spreading
Now for the satisfying part: the pour.
The Flood Coat
Pour the mixed epoxy into the center of your table top. Don’t be shy—you want enough material to self-level. Use your plastic spreader or trowel to guide the resin toward the edges. You don’t need to apply pressure; just guide the liquid so it covers the entire surface evenly.
Handling the Edges
Allow the epoxy to flow over the edges. You can use a gloved finger or a foam brush to smooth the vertical sides. The surface tension will naturally round over the sharp corners, creating a professional look.
Step 4: Removing Bubbles
Immediately after spreading, the surface will likely look cloudy. This is caused by thousands of tiny air bubbles introduced during mixing.
Using Heat
Take your heat gun or propane torch and hold it a few inches above the surface. Keep it moving constantly; never let it stay in one spot, or you will scorch the resin. You will see the bubbles pop instantly, leaving behind glass-clear resin.
Check back every 10-15 minutes for the first hour to pop any new bubbles that rise to the surface.
Step 5: Curing and Finishing Touches
Patience is key during the curing phase.
The Waiting Game
Let the table sit undisturbed for at least 24 to 72 hours, depending on the manufacturer’s instructions. Keep the room temperature stable. If the room gets too cold, the epoxy may stay soft.
Dealing with Drips
While the top is curing, drips will form on the underside of the table. You can scrape these off with a putty knife about 30-45 minutes after the pour when they are semi-solid. Alternatively, you can wait until they are fully cured and sand them off.
Polishing (Optional)
If your environment was clean, your table should be perfect. However, if a stray hair or dust mote landed in the finish, don’t panic. You can wet-sand the surface with high-grit sandpaper (up to 3000 grit) and then buff it with a polishing compound to restore the gloss.
Common Mistakes to Avoid
Even with the best intentions, things can go wrong. Here are a few pitfalls to watch out for during your DIY epoxy table project:
- High Humidity: Moisture affects how epoxy cures. Avoid pouring on rainy days or in humid garages.
- Mixing Too Fast: Whipping the resin introduces too many air bubbles. Stir steadily but not aggressively.
- Old Product: Epoxy has a shelf life. If your hardener has turned yellow or crystallized, buy a new kit.
Safety First
Working with chemicals requires respect for safety. Always work in a well-ventilated area. While many modern epoxies are VOC-free, it is smart to wear a respirator, especially during the mixing and sanding phases. Uncured epoxy is a skin irritant, so keep those gloves on until the project is dry.
Conclusion
Mastering how to epoxy a table top is a skill that opens up endless possibilities for home improvement and custom furniture creation. The process requires preparation and patience, but the result—a durable, stunning epoxy finish—is worth every minute of effort.
Don’t be intimidated by the sticky nature of the material. Start with a small side table or a practice board to get the feel for how the resin flows. Once you see that first crystal-clear reflection, you’ll be looking for every wooden surface in your house to upgrade.
Have you tried an epoxy project recently? We would love to see your results or answer your questions about the process. Share your experience in the comments below
Leave a Reply